


 100 / 128

94
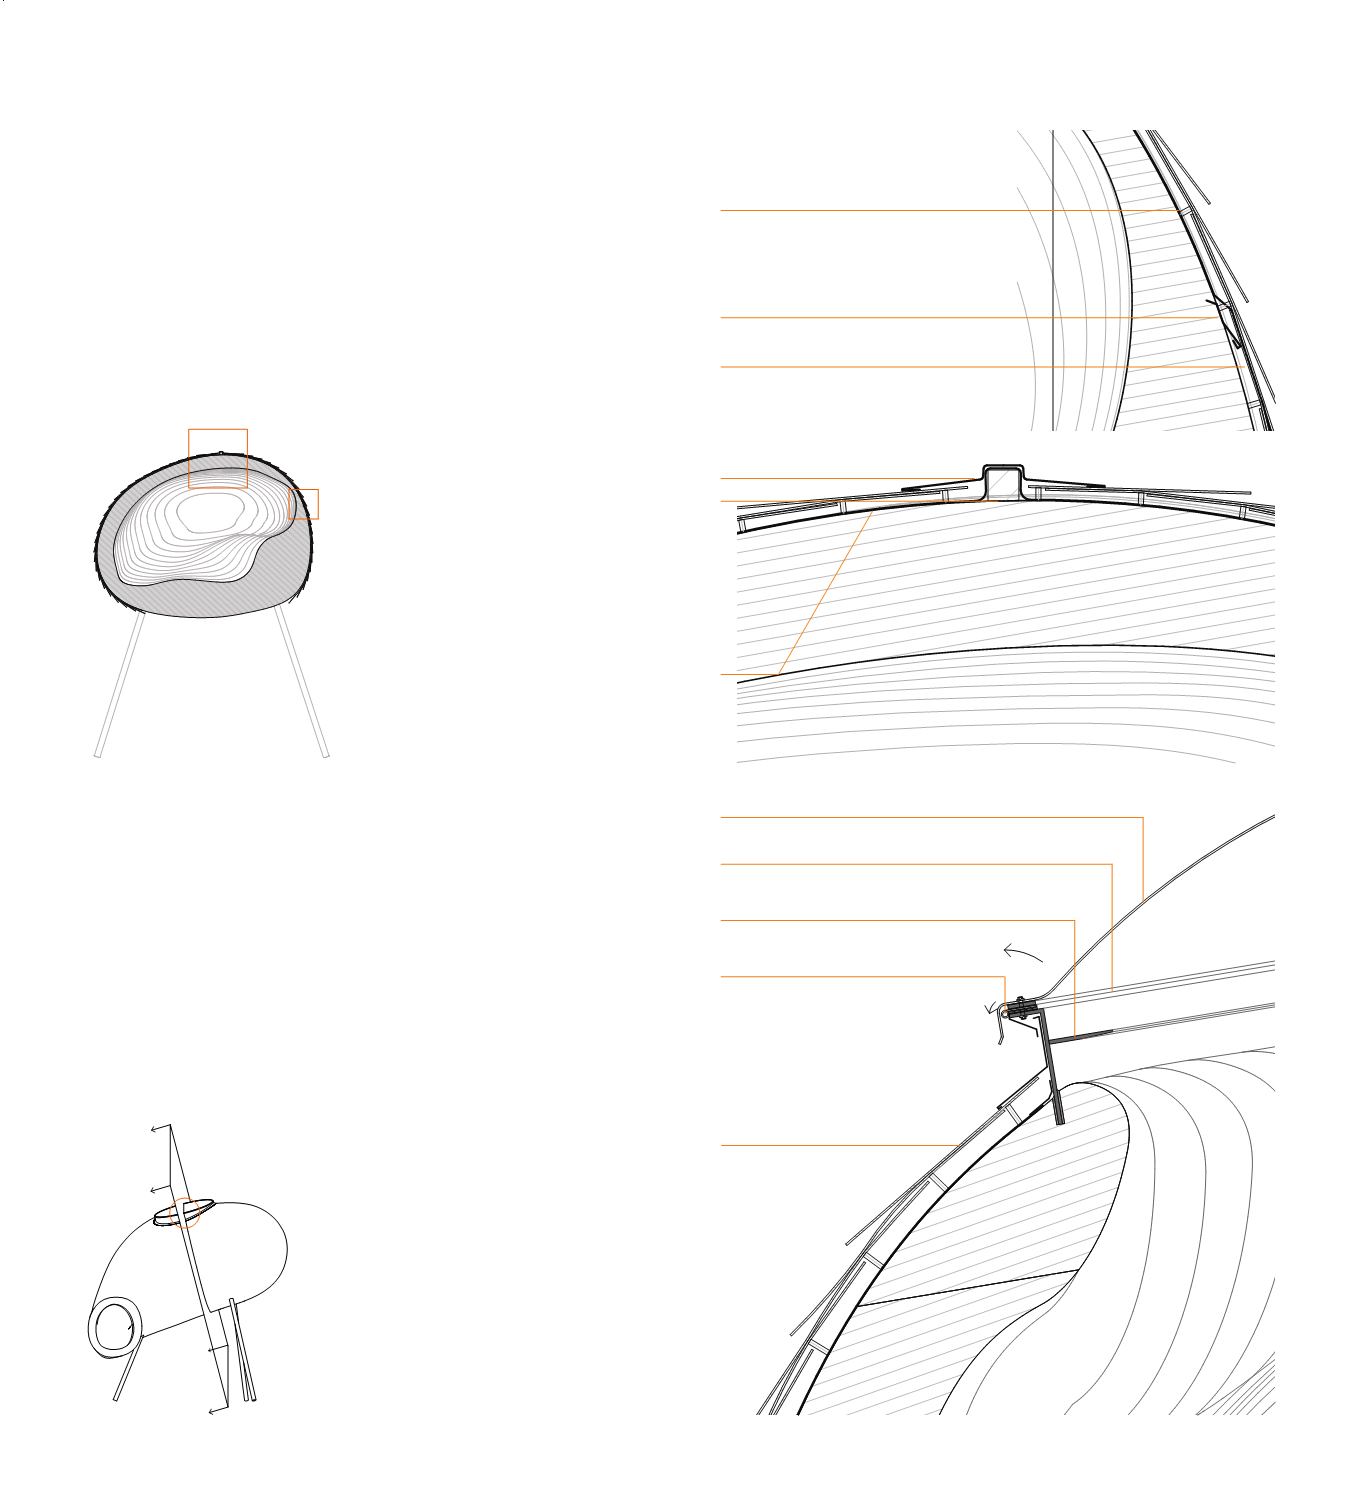
WINDOW
The physical experience of the night sky is an essential aspect
inside the wooden structure. We find it of high importance that
the window can be open fully, as well as this procedure should
be easy to do. Our solution is a two-parted plastic dome, a light
structure easily maneuverable. You push it open and get it back
to place by pulling connected ropes. (fig. 25)
Another aspect is the window frame, that visually should be as
sharp and clean as possible to make the perception effect of the
sky lying close to the window (fig. 25.3)
3 MM polycarbonate formpressed dome
6 MM galvanized steel, flanged, inner ø
1550 MM
6 MM galvanized steel, outer ø 1550 MM, inner
ø 1450 MM, chamfered edge down to 3 MM
hinge for dome
GSEducationalVersion
tar paper
cross laminated lumber - CLT
48 x 48 ridgebeam
cross laminated lumber - CLT
3 MM polycarbonate shingles
20 MM spacer
tar paper
cross laminated lumber - CLT
Cladding:
ridge flashing
tar paper drawn over ridge
48 x 48 ridgebeam
cross laminated lumber - CLT
At ridge:
Målestokk:
1:10, 1:50
flashing
tar paperdrawnover shingles
1
2
3
4
5
1.Polycarbonate formpressed dome 3mm
2.Galvanized steel 6mm, flanged, inner Ø1550mm
3.Galvanized steel 6mm, outer Ø1550mm, inner Ø1450mm,
chamfered edge down to 3mm
4.Hinge for dome
5. Cladding: Cross laminated lumber-CLT
Tar paper
Spacer 20mm
Polycarbonate shingles 3mm
2
3
1
1
4
5
1.Cladding: Cross laminated lumber-CLT
Tar paper
Spacer 20mm
Polycarbonate shingles 3mm
2.Tar paper drawn across flashing
3.Zinc flashing
4.Wood ridgebeam 48x48mm
5.Zinc ridge flashing
Fig 25: Window detail E 1:5
Fig 24: Ridege cladding detail E 1:5
Fig 23: Cladding ending detail E 1:10
Finally, there are some points on the structure that are
more fragile. Over the back of the structure there is an extra
protecting layer of tar paper (fig.23.2). Along the “spine” on the
back where the shingles are changing direction (fig. 24), around
the window (fig. 25), flashing must be added for final protection.
Underneath the form is not in danger of being wet, and the
wood can remain exposed, as a hint of what is hiding inside.
Fig 24
Fig 23
Fig 26