NX Drafting
This tutorial describes how to create mechanical drawings based on a predefined NTNU template in Siemens NX. To be able to access the drawing templates, make sure you are running NX on VMWare Industry 4.0 VDI (desktop.ntnu.no) and starting NX from the correct shortcut as shown below. Screenshots in this tutorial are based on the NX Advanced menus setup.


Basic steps for creating a drawing in NX
- Open the part file in NX and make sure it is the active part.
- Select Drafting to invoke the drawing application.
- Select NTNU as drawing template.
- Enter title block information. Can also be postponed and updated later.
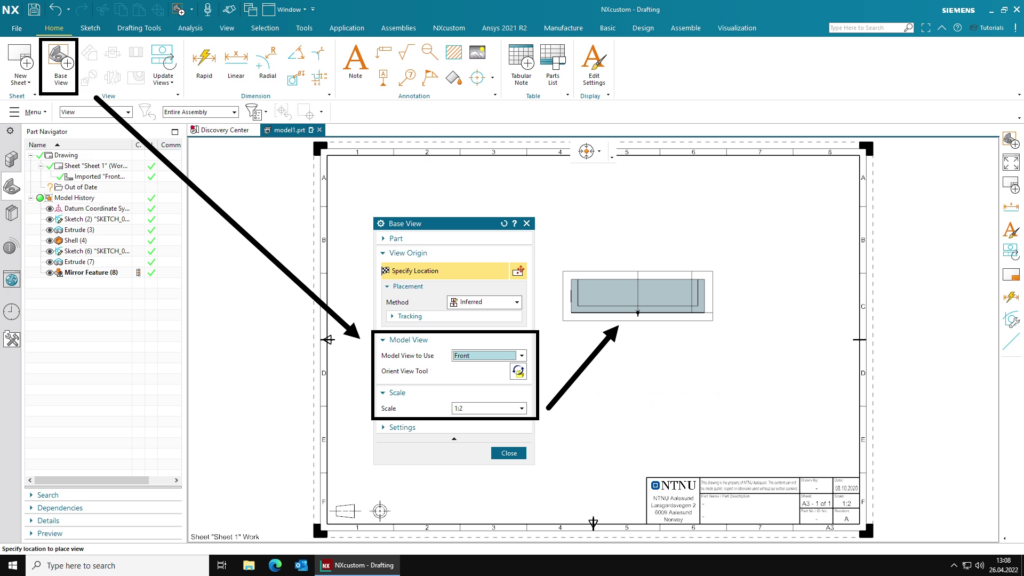
- Create base view.
- Create projected-, detail- and section views.
- Add dimensions.
- Update title block information and check drawing.
- Export drawing as pdf
2. Start NX Drafting application

3. Create a new sheet

4. Title Block

5. Base view
6. Projected-, detail-, and section-views


7. Adding dimensions
8. Drawing check
Cleaning up the drawing and checking for errors